Posts

Showing posts from 2016

Tutorial #1: Welcome to TurtleStitch

The first TurtleStitch tutorial is on its way! Here is a glimpse:

Hour of Code 12/14/16

Image
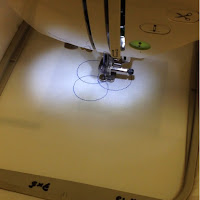
The Hour of Code was a success! I loved meeting the students who were interested in coding. There was a session for paper embroidery and for digital embroidery. In the paper embroidery station, a few students told me how it was "cool" that they could transfer a code onto paper, making it "3D." The code they sewed was the paw-print and it can be found here .   In the digital embroidery station, the students used a computer for TurtleStich and then printed out the code on the digital embroiderer. There were two students who wanted to code a Rockets logo. When they first started coding and wanted the action of the block to repeat, they kept clicking on the mouse, but I told them that if they were to run the script, the code of them repeating the block would be lost. I taught them to use the repeat block and once they understood it, they used it for the rest of their code. "It's all about trial and error," I told them. And so, they experiment

Week 12/12/16 Ideas

This week, I will create a "sample tutorial" of the TurtleStitch tutorial with a screencast. Stay updated by following by social medias: Instagram: @steam.ct ( instagram.com/steam.ct ) Twitter: @steamct ( www.twitter.com/steamct )

Two New TurtleStitch Tutorials

Image
Hey, all! I added two tutorials onto the TurtleStitch gallery, and they are going to be used in a future TurtleStitch feature! Here are the links: Stitching a Line Stitching a Circle

Week 12/5/16 Goal

This week, I will work on the tutorial for the TurtleStitch page. Last week, I embroidered a pawprint on paper after I coded on TurtleStitch. A new blog post on that will be posted next week on Thursday after I present during Hour of Code (12/14/16)! I hope to share with you all about the continuation of what I did.

Paper Embroidery: Machine vs. Me

Image
I hope you all had a wonderful Thanksgiving! Over the break, I worked on paper embroidery to determine my motion compared to the motion of the digital embroiderer. I noticed the machine first sewed three circles and then continuously sewed three more circles that overlapped the last. When I sewed onto the paper, I didn't think of sewing the same way. I sewed circles that skipped after each other. With the holes I punctured onto the paper, I sewed a circle, and then I skipped over one circle and went for the next. This sounds confusing, but I am attaching a photo documentation of what I did and what the machine did! What do you think causes the machine to embroider three circles in the first "layer"? Is it the code? Machine's process: My process:    

This Week's Plan

As I stated in a previous blog post, I wanted to examine the stitches when the machine is in motion. This week I am planning on working with paper embroidery, so I could sew onto cardstock and become the machine myself. I will then print the code onto fabric, compare the motion and look at how the stitches come together.

Using Operators On My Circle Code

Image
I want to learn more about different blocks so I could add onto my old code, so I am starting with operators . I am planning on finding out what would happen if I replace most of my numbered values to operators . The picture on the right was what happened when I replaced the second repeat variable with pick random 1 to 10 . I guess the shape of the circle changed since the blocks inside the second repeat were the codes that created the circle, which appeared previously. The random amount of repetition prevented the turtle from creating a full circle and I find it really interesting. The picture on the left looks like random zigzags across the stage. I believe this happened because most of my operators consisted of pick random _ to _ and they defined the turn clockwise _ degrees . I think the pick random _ to _  is not good for creating a certain image because the outcome of the stitching varies each time the code runs. What do you think would happen if I change the pick rando

Trying Out Predictions

Image
For this code, I removed the extra "move 10 steps" block from the inner repeat block and I changed the outer repeat block to 7. This made the diameter of my circles smaller, but it didn't come together to create a full circle. If I wanted my design to look like a complete circle, I would change the "repeat 7" to "repeat 28" or a number greater than 7, which means that there would be a greater rotation of circles to form a design similar to the original design: I thought about changing the "move 10 steps" variable to 20, but I soon realized it changed the length of the jumps within the stitches. In my next trial, I adjusted the "turn clockwise 90 degrees block" to 180 degrees and the repeat to 11. I noticed how the turtle/arrow moved differently compared to my other trials. In the other trials, the circles were created next to each other, but for this code with 180 degrees, the circles were created across from each other.

Predictions

Image
1 1 2 2      My goal for this code is to alter it so I could make the diameter of the circle smaller. I also want to make the white space greater in the design. My prediction for making this happen is to change the blocks in the inner repeat block. Some changes would probably be removing the extra "move 10 steps" block. I believe I need to change those certain blocks because it is what creates the circles. I will try out my predictions and see what happens!

Circles

Image
This week, I coded a design I used to think was difficult, based off of its appearance. I was playing around with the blocks and when I ran the code, it looked similar to a design I saw a while ago from the TurtleStitch gallery. I later played around with the code and I tried making new designs with it. From gallery Original Design For the two above designs, I altered the code by changing the repeats to 5 and 15, I added two extra "move 10 steps" blocks in the internal repeat and I changed the angles to 270 and 40 degrees. Original code For this, I altered the first repeat from 30 to 4, changed the angles from 15 to 18 and 90 to 180 For this, I changed the angle from 90 degrees to 180 degrees and it altered the distance from the center